Phishing Simulation as a Service (PSaaS)
- PSaaS Overview
- How Our PSaaS Works
- PSaaS Deliverables
- Allowlisting
- Email Allowlisting - Introduction Page
- Email Allowlisting - Quick Reference - IPs, & URLs
- Email Allowlisting - Use M365 Defender to allow a Phishing Simulation
- Email Allowlisting - Automatically Download Images For Emails Sent To Microsoft 365
- Email Allowlisting - Bypass Safe Link/Attachment Processing of M365 Advanced Threat Protection (ATP)
- Phishing Website Allowlisting - Introduction
- Phishing Website Allowlisting - Microsoft Defender for Endpoint
PSaaS Overview
What is PSaaS?
A service to simulate realistic phishing attacks for awareness training.
Use Cases
- Employee security testing
- Audit support (SOC2, ISO)
- Monthly internal awareness campaigns
Plans
- Starter: Basic email campaign with static template
- Pro: Targeted phishing + tracking
- Enterprise: Multi-wave + custom domain and training follow-up
How Our PSaaS Works
Steps
- Choose template or create custom scenario
- Add targets via portal or upload CSV
- Schedule & launch campaign
- Analyze results in report
Tracking Features
- Open rate, click rate, submission rate
- Timeline of victim interaction
PSaaS Deliverables
Deliverable Items
- Campaign report (PDF & CSV)
- Department & role-based breakdown
- Awareness heatmap
- Recommended next training step
Allowlisting
Email Allowlisting - Introduction Page
Allowlisting GrintOps in your Email Platform
Allowlisting - Quick Reference - IPs, Headers & URLs
Multiple allowlisting methods are listed below. Choose the method that best suits your organisation - preferred methods have been tagged.
Microsoft/Office 365
- Allowlisting - Use M365 Defender to allow a Phishing Simulation
- M365 Direct Email Injection (API Integration To Bypass Allowlisting)
- Supplemental Allowlisting Guides (Optional):
- Allowlisting - Bypass Safe Link/Attachment Processing of M365 Advanced Threat Protection (ATP)
- Allowlisting - Automatically Download Images For Emails Sent To Microsoft 365
- Integrating With Microsoft's Built-In "Report Phishing" Button On Outlook
- M365 With Third-Party Email Gateway/Mail Relay/ Hybrid On-Prem Exchange:
Email Allowlisting - Quick Reference - IPs, & URLs
When applying allowlists to your email servers and/or email filtering solutions, please refer to the quick reference information below.
Be careful not to over-allowlist and only configure what's necessary to allow GrintOps emails through.
Mail Server IPv4 Addresses:
135.84.80.0/24
136.143.161.0/24
136.143.184.0/24
136.143.188.0/24
165.173.129.0/24
165.173.174.0/23
165.173.180.0/24
165.173.182.0/24
Note: If you need to provide your email filter with a subnet mask for the above IP Addresses, please use /32 for each IP.
Sending Domains:
office365-webnotif.com
office365-webnotif.site
miro-apps.online
hukum0nline.com
slack-apps.online
github-apps.online
Phishing Website Domains:
office365-webnotif.com/*
*.office365-webnotif.com/*
office365-webnotif.site/*
*.office365-webnotif.site/*
miro-apps.online/*
*.miro-apps.online/*
hukum0nline.com/*
*.hukum0nline.com/*
slack-apps.online/*
*.slack-apps.online/*
github-apps.online/*
*.github-apps.online/*
Should you have any difficulties with allowlisting, please don't hesitate to contact us.
Email Allowlisting - Use M365 Defender to allow a Phishing Simulation
To ensure GrintOps can effectively simulate phishing campaigns, you will need to allowlist our emails. We highly recommend this method for allowlisting as it's been explicitly created by Microsoft for the purpose of conducting phishing simulations.
Note: If you find that website links are being re-written and lead to a "suspicious website" page after allowlisting, your organisation may need to add additional attachment and URL exemptions. To enable these exemptions please see our support article: Allowlisting - Bypass Safe Link/Attachment Processing of M365 Advanced Threat Protection (ATP)
Use the Microsoft 365 Defender portal to configure third-party phishing simulations in the advanced delivery policy
Note: Prefer to use PowerShell? Use our prepared script
1. Login to Microsoft 365 Defender at the following link to go straight to the Phishing Simulation allowlisting form: https://security.microsoft.com/advanceddelivery?viewid=PhishingSimulation
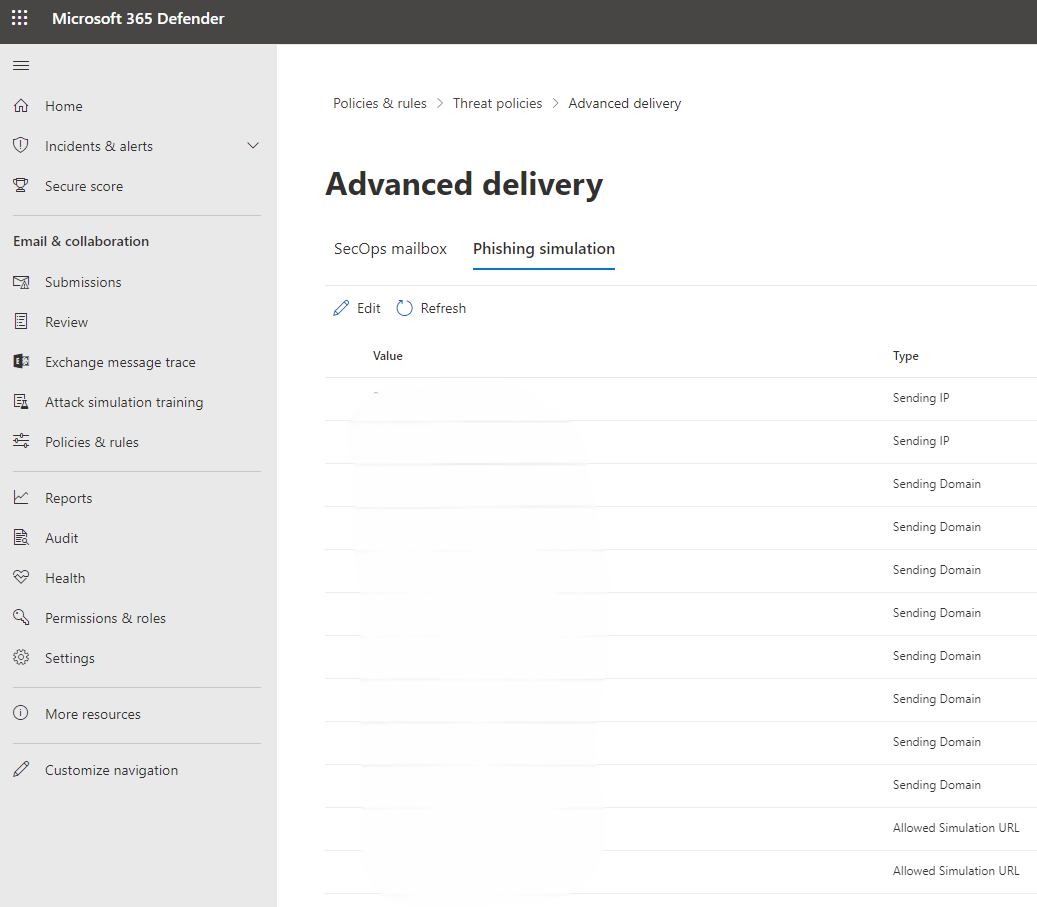
Note: This form can also be accessed by going to https://security.microsoft.com/ and clicking through Email & Collaboration > Policies & Rules > Threat Policies > Advanced Delivery > Phishing Simulation
2. Click  Edit or If there are no configured phishing simulations, click Add.
3. On the Edit third-party phishing simulation flyout that opens, configure the following settings:
Sending Domain:
The following are examples of phishing domains that may be used:
office365-webnotif.com
office365-webnotif.site
miro-apps.online
hukum0nline.com
slack-apps.online
github-apps.online
Sending IP:
The following are examples of sending IP addresses that may be used in phishing simulation campaigns or email transmissions:
135.84.80.0/24
136.143.161.0/24
136.143.184.0/24
136.143.188.0/24
165.173.129.0/24
165.173.174.0/23
165.173.180.0/24
165.173.182.0/24
Simulation URLs to allow:
The following are examples of simulation URLs that should be allowed to ensure phishing simulation emails and landing pages function properly:
office365-webnotif.com/*
*.office365-webnotif.com/*
office365-webnotif.site/*
*.office365-webnotif.site/*
miro-apps.online/*
*.miro-apps.online/*
hukum0nline.com/*
*.hukum0nline.com/*
slack-apps.online/*
*.slack-apps.online/*
github-apps.online/*
*.github-apps.online/*
Note: All the above domains and IP addresses are under the sole control of GrintOps. As such we can ensure that no unintended emails will originate from these IPs and domains after allowlisting occurs.
4. When you're finished, click Add/Save and then click Close.
Note: Allowlisting may take up to an hour to take effect.
All done! Allowlisting can be tricky... should you have any difficulties, please don't hesitate to contact us.
Troubleshooting: If you run into issues with emails continuing to go to spam/quarantine folders. You may have Microsoft Advanced Threat Protection (ATP) enabled which may require additional allowlisting. Please see our guide here to Bypass Safe Link/Attachment Processing of M365 ATP.
PowerShell Allowlisting Script
Want to automate the deployment of GrintOps allowlisting? Use our prepared PowerShell script below.
Step 1. Ensure Exchange Online V3 For Powershell Is Installed
Install-Module -Name ExchangeOnlineManagement -ForceStep 2. Connect Exchange Online For Powershell To Your Microsoft 365 Tenant
Note: Please replace the value YOUR-ADMIN-EMAIL with the M365 administrator email that you wish to sign in with.
Import-Module ExchangeOnlineManagement
Connect-ExchangeOnline `
-UserPrincipalName YOUR-ADMIN-EMAIL `
-ShowProgress:$false `
-LoadCmdletHelp # optional: if you want Get-Help for EXO cmdlets
Step 3. Create The Phishing Simulation Allowlist Policies And Configurations
Note: If you've white-labelled GrintOps , make sure to replace the grintops.com and learn.grintops.com domains with your white-labelled domains.
# 1. Create the override policy
New-PhishSimOverridePolicy -Name PhishSimOverridePolicy

# 2. Confirm it’s there
Get-PhishSimOverridePolicy

# 3. Create the override rule pointing to the allowlisted domains & IPs
New-ExoPhishSimOverrideRule `
-Name PhishSimOverrideRule `
-Policy PhishSimOverridePolicy `
-Domains office365-webnotif.com, office365-webnotif.site, miro-apps.online, hukum0nline.com, slack-apps.online, github-apps.online `
-SenderIpRanges: 135.84.80.0/24 , 136.143.161.0/24 , 136.143.184.0/24 , 136.143.188.0/24 , 165.173.129.0/24 , 165.173.174.0/23 , 165.173.180.0/24, 165.173.182.0/24

# 4. Allowlist the phishing website URLs in Defender’s tenant allow/block list
New-TenantAllowBlockListItems `
-Allow `
-ListType Url `
-ListSubType AdvancedDelivery `
-Entries office365-webnotif.com/*, office365-webnotif.site/*, *.miro-apps.online/*,hukum0nline.com/*,*.slack-apps.online/*,github-apps.online/*`
-NoExpiration

# 5. Verify your rule
Get-ExoPhishSimOverrideRuleEmail Allowlisting - Automatically Download Images For Emails Sent To Microsoft 365
Would you like to have images automatically download for simulated phishing and notification emails sent by GrintOps?
In this support article we'll walk through the allowlisting process to add GrintOpsmanaged domains to the Outlook Safelist Collection, ensuring images are automatically downloaded. This has the added benefit of ensuring the email view metric in simulated phishing campaigns is accurate. However, the email view metric isn't essential to the success of campaigns, and as a result, this guidance is purely optional and can be added at your own discretion.
Note: The guidance in this article builds upon Microsoft guidance on configuring the safelist collection on an Microsoft 365 mailbox. Please refer to this article to learn more about mailbox safelist collections.
Table Of Contents:
Prerequisites
-
Exchange Online PowerShell Module: Ensure you have the Exchange Online PowerShell module installed. If not, install it using the following command:
Install-Module -Name ExchangeOnlineManagement -
Administrative Privileges: You must have the necessary permissions to modify mailbox configurations across your organization.
Step 1: Connect to Exchange Online PowerShell
Open PowerShell with administrative privileges and connect to Exchange Online:
Import-Module ExchangeOnlineManagement
Connect-ExchangeOnline -UserPrincipalName [email protected]
Note: Replace [email protected] with your admin username.
Step 2: Define the Domains to Add
Create an array containing the GrintOps domains you wish to add to the Safe Senders list:
$domains = @(
    'office365-webnotif.com',
    'office365-webnotif.site',
    'miro-apps.online',
    'ukum0nline.com',
    'slack-apps.online',
    'github-apps.online'
)
Note: If you've setup white-labelling, we recommend adding your white-labelled domain to the list.
Step 3: Add Domains to All Mailboxes
Run the following command to add the specified domains to the Safe Senders list for all users:
The following is an example of how to add domains to the Safe Senders list for all mailboxes:
# Fetch all mailboxes once
$mailboxes = Get-Mailbox -RecipientTypeDetails UserMailbox -ResultSize Unlimited

# Add each domain one at a time for every mailbox
foreach ($domain in $domains) {
  foreach ($mbx in $mailboxes) {
      Set-MailboxJunkEmailConfiguration `
          -Identity $mbx.Identity `
          -TrustedSendersAndDomains @{ Add = $domain }
  }
  # Pause for 1 second before moving to the next domain
  Write-Host "Added '$domain' to TrustedSendersAndDomains for all mailboxes."
  Start-Sleep -Seconds 1
}
Explanation:
Get-Mailbox -ResultSize Unlimited: Retrieves all mailboxes in your organization.foreach { ... }: Iterates over each domain and then each mailbox retrieved.Set-MailboxJunkEmailConfiguration: Updates the junk email settings for the specified mailbox.-TrustedSendersAndDomains @{Add=$domain}: Adds the specified domain to the existing Safe Senders list without overwriting it.
Step 4: Verify the Changes
To confirm that the domains have been added, you can check the Safe Senders list of a specific mailbox:
Get-MailboxJunkEmailConfiguration -Identity [email protected] | Select-Object -ExpandProperty TrustedSendersAndDomainsNote: Replace [email protected] with the email address of a user in your organization.
Additional Notes
-
Processing Time: Depending on the number of mailboxes, this operation may take some time.
-
Error Handling: If you encounter any errors, ensure that you have the necessary permissions and that all domain names are correctly specified.
-
Maintenance: If you need to remove domains in the future, you can modify the
Set-MailboxJunkEmailConfigurationcommand accordingly:Set-MailboxJunkEmailConfiguration -Identity $_.Identity -TrustedSendersAndDomains @{Remove=$domains}
Email Allowlisting - Bypass Safe Link/Attachment Processing of M365 Advanced Threat Protection (ATP)
In order for GrintOps emails to function correctly, there are two sections that require additional rules to bypass Microsoft's Advanced Threat Protection system.
Note: As a precaution, we recommend waiting 1 hour after enabling these bypass policies to begin testing.
Step 1. Bypass ATP Attachments Scanning
To bypass ATP Attachment Processing, set up the following mail flow rule:
- Log into the Microsoft 365 (formerly Office 365) portal and select "Admin centers" > "Exchange".
- Select "Mail flow" to expand the settings menu then select "Rules".
- Click "Add a rule".
- Click "Create a new rule".
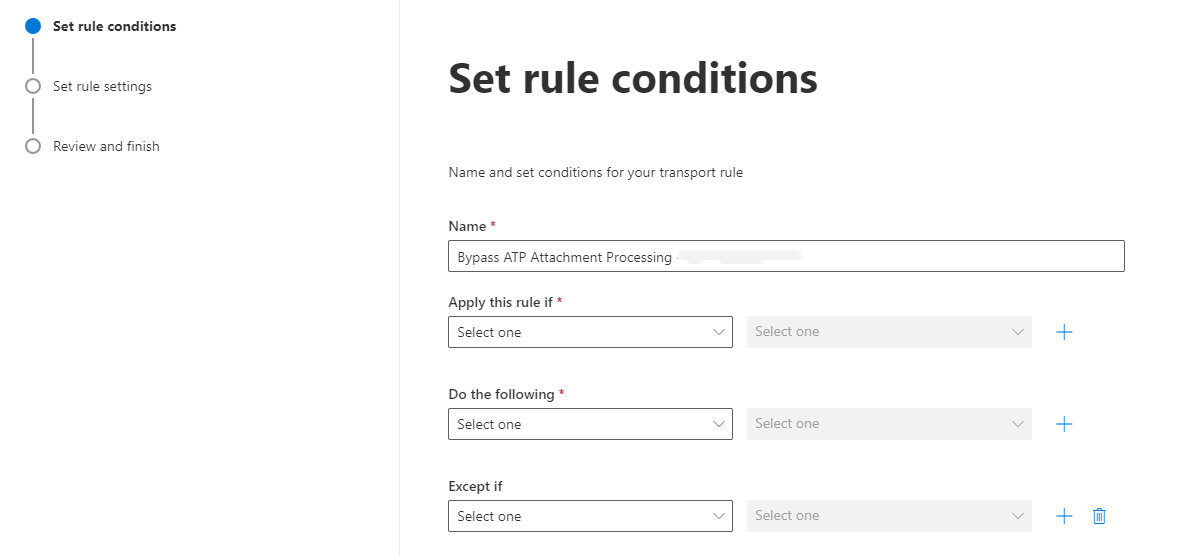
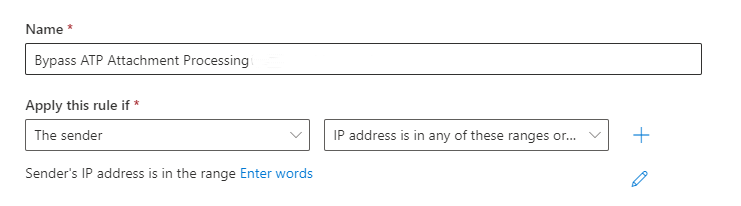
- Give the rule a name, e.g., "Bypass ATP Attachment Processing - IP Address".

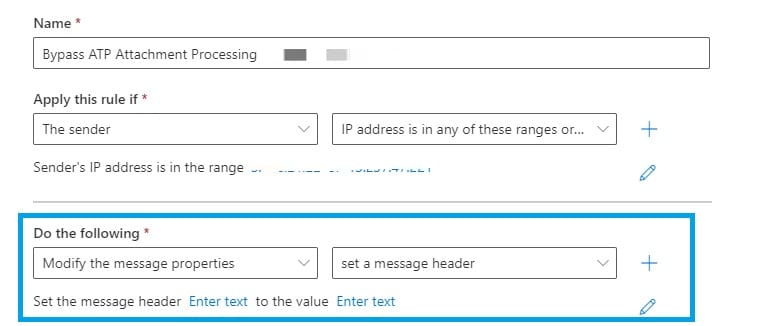
- Under "Apply this rule if" select "The Sender..." > "IP address is in any of these ranges or exactly matches"

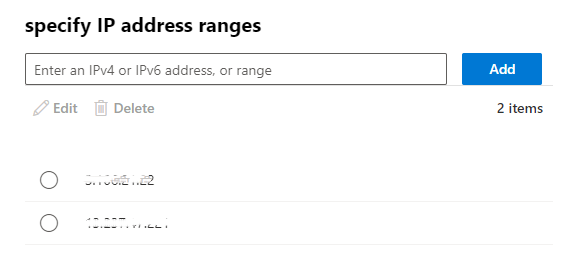
- Then enter each of GrintOps IP addresses, clicking the "Add" button for each. (A complete list of our IP addresses can be found here.) Then hit "Save".

- Under "*Do the following" select "Modify the message properties..." > "set a message header".

- Edit the properties of this by selecting the "Enter text" buttons:
Use the following entries:
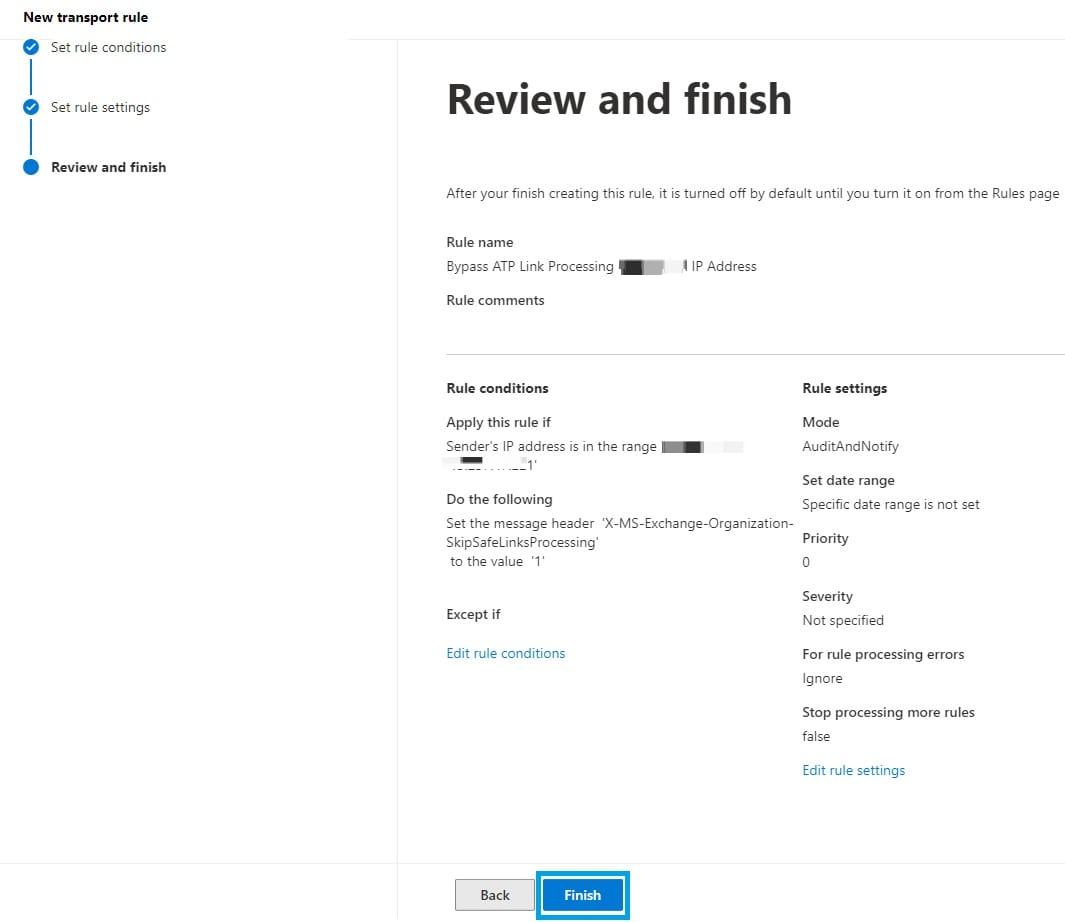
Set the message header to "X-MS-Exchange-Organization-SkipSafeAttachmentProcessing" and set the value to "1". - Click "Next".
- Leave all settings in "Set rule settings" as their default values and click "Next".
- Review your settings and click "Finish".

Step 2. Bypass ATP Safe Link Scanning
Note: The next rule to implement is dependent on whether you use Defender for Office 365 (ATP) Plan 1 or Plan 2.
- If you use Plan 1, please ONLY implement the Mail Flow Rule (ATP Link Bypass).
- If you use Plan 2, please ONLY implement the Threat Policy (Safe Link Bypass).
Do not implement BOTH rules below as they will interfere with each other.
If you do not know which Defender plan you have, simply follow the guide for Plan 2. If the Safe Links policy (on step 4) is not available, you have Plan 1.
Step 2. Plan 1 - Mail Flow Rule (ATP Link Bypass)
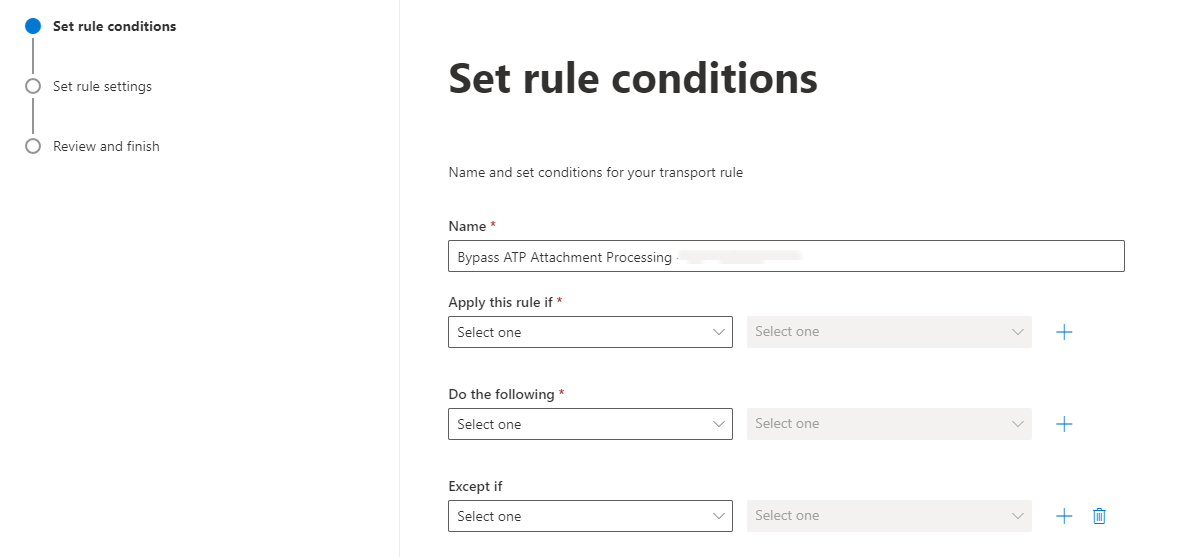
To bypass ATP Link Processing, set up the following mail flow rule:
- Log into the Microsoft 365 (formerly Office 365) portal and select "Admin centers" > "Exchange".
- Select "Mail flow" to expand the settings menu then select "Rules".
- Click "Add a rule".
- Click "Create a new rule".
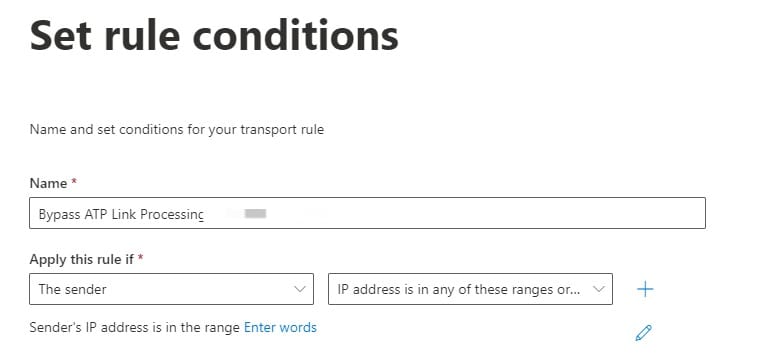
- Give the rule a name, e.g. "Bypass ATP Link Processing - GrintOps IP Address".
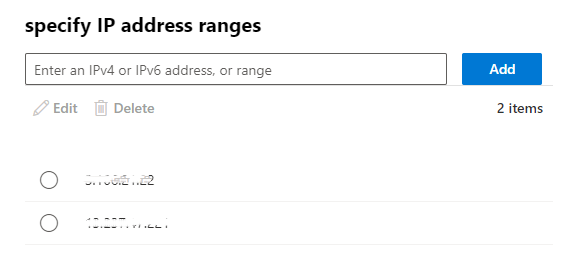
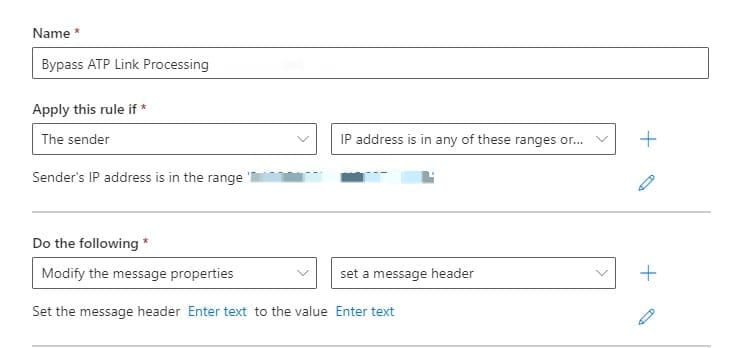
- Under "Apply this rule if" select "The Sender" > "IP address is in any of these ranges or exactly matches".

- Then enter each of GrintOps IP addresses, clicking the "Add" button for each. (A complete list of our IP addresses can be found here.) Then hit "Save".
- Under "*Do the following" select "Modify the message properties..." > "set a message header".

- Edit the properties of this by selecting the "Enter text" buttons:
Use the following entries:
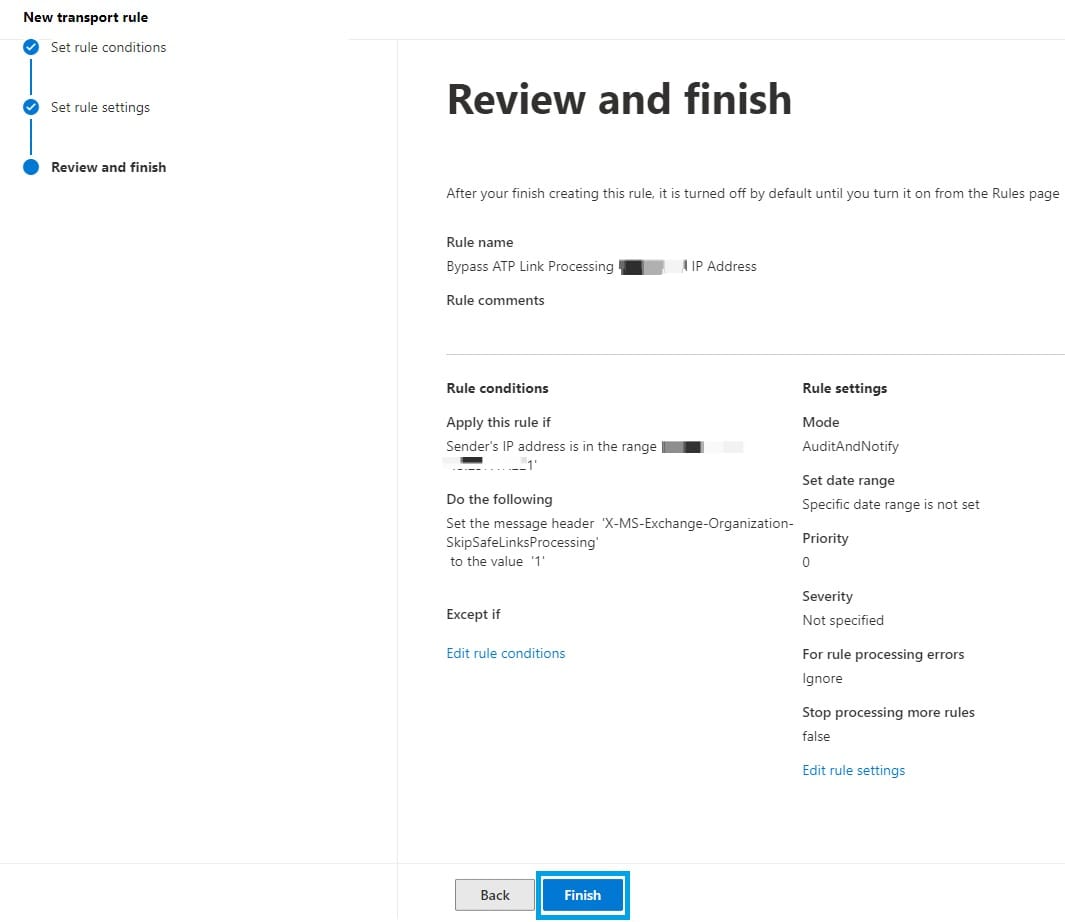
Set the message header to "X-MS-Exchange-Organization-SkipSafeLinksProcessing" set the value to"1". - Click "Next".
- Leave all settings in "Set rule settings" as their default values and click "Next".
- Review your settings and click "Finish".
Step 2. Plan 2 - Threat Policy (Safe Link Bypass)
- Visit your Microsoft 365 Admin Center and click "Security" to open the Microsoft 365 Defender page.
- Click "Policies & rules" > "Threat policies"
- Click Safe Links
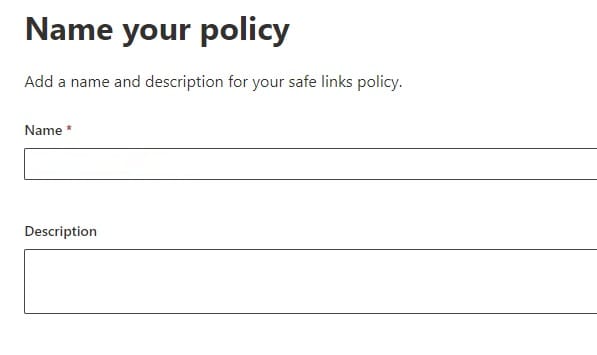
- Either edit the existing ATP Link Policy and click "Edit policy" or click the "Create" button to make a new one and call it something descriptive (e.g. GrintOps Safe Link Bypass). Once done, click Next.

- Ensure the policy includes all employees within your organisation. If you have a group that can be used for this, then select the group or simply select the domain that your employees have all their email addresses under (as shown in the example below). Once done, click Next.

- Leave all items as default but select the Manage 0 Urls hyperlink under the "Do not rewrite URLs..." field. Then click to add URLs:
- Finally, in the "Do not rewrite the following URLs" section, add domains that GrintOps use for phishing landing pages. Please see our Allowlisting - Quick Reference article for a full list of our landing page domains. Each landing page domain needs to be added.
Note: Each domain must be added using the format *.[rootdomain]/* so if you are adding the domain "office365-webnotif.com.com", you need to enter *.office365-webnotif.com/*
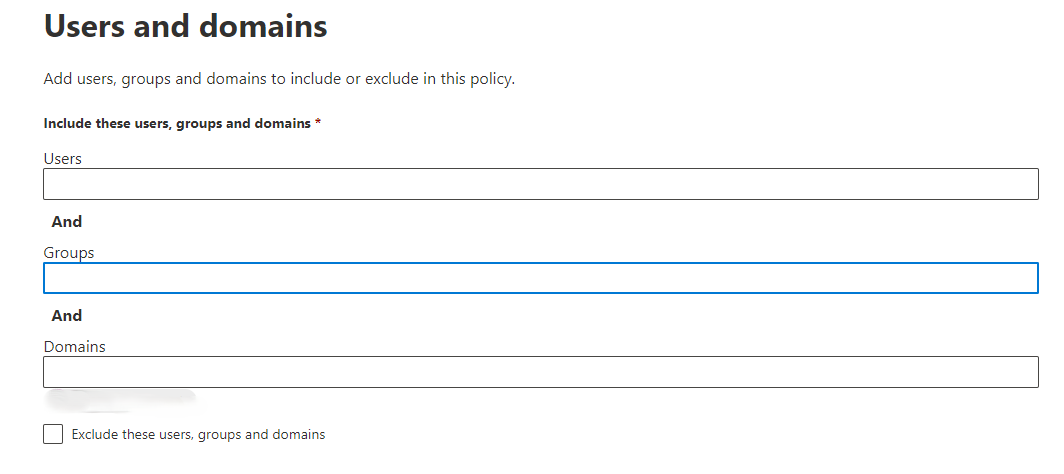
The following are examples of phishing website domains:
office365-webnotif.com
office365-webnotif.site
miro-apps.online
hukum0nline.com
slack-apps.online
github-apps.online
koprabymandri.com
Click Next and then Select Submit. And you're all done! These changes may take up to an hour to take effect.
Phishing Website Allowlisting - Introduction
GrintOps invests significant effort into ensuring our phishing websites work without issue. However, depending on the security tools in use, specific issues may arise when attempting to use our phishing websites for simulated phishing purposes.
In the list below, we outline some of the security solutions that may be in-use and whether any allowlisting is needed:
- Google Safe Browsing: No action required
- Microsoft Smart Screen: No action required
- Microsoft Defender for Endpoint (Web Protection): Allowlisting required
- McAfee/Trellix Web Control: No action required
- Palo Alto Networks PAN-OS And Prisma Access: Allowlisting required
- Sophos Web Protection: Allowlisting required
- Cisco Umbrella: Allowlisting required
- Fortinet FortiGate: Allowlisting required
- VIPRE Endpoint Security: Allowlisting recommended
If you're using a web filtering solution outside those listed above, and you're experiencing issues, please contact the GrintOps team.
Phishing Website Allowlisting - Microsoft Defender for Endpoint
If your organization uses Microsoft Defender for Endpoint, Microsoft Defender XDR, or other Microsoft Web Protection products, your employees may experience issues with loading our simulated phishing websites.
Either a red blocked screen, or a little pop-up from Windows Defender may when attempting to load our simulated phishing websites.
Windows Defender Blocked Popup
Microsoft SmartScreen Blocked Screen
The reason access is blocked is due to the category Microsoft has marked these domains under. To allowlist GrintOps Phishing websites, please follow the below guide.
Allowlisting GrintOps Phishing Websites
It's possible to override the blocked category in web content filtering to allow a single site by creating a custom indicator policy. The custom indicator policy will supersede the web content filtering policy when it's applied to the device group in question.
To define a custom indicator, follow these steps:
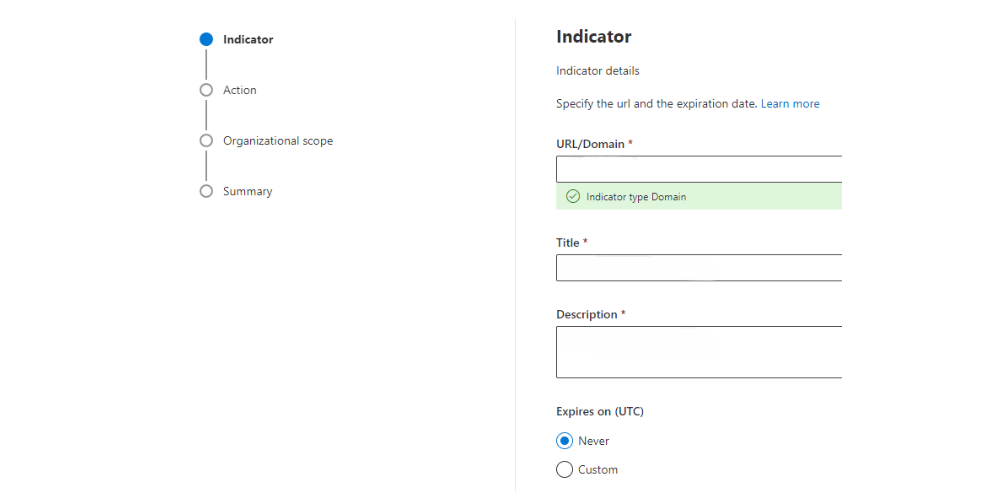
- In the Microsoft Defender portal, go to Settings > Endpoints > Indicators > URL/Domain > Add Item. (Or click here - https://security.microsoft.com/securitysettings/endpoints/custom_ti_indicators?childviewid=url)
- The following are examples of GrintOps phishing website domains to be added under the "Manage URLs to Not Rewrite" section. One-by-one, enter the following GrintOps phishing website domains with an expiration of your choosing and ensuring the "Allow" action is specified for all devices in your organization:
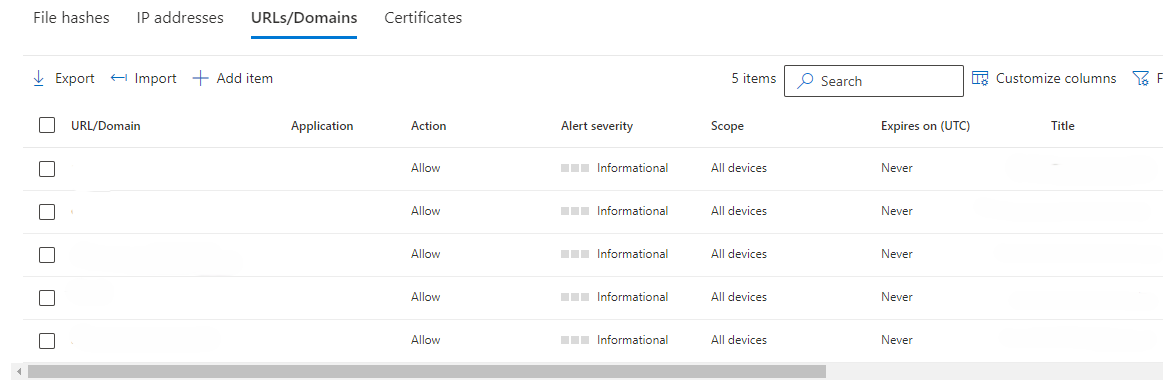
All done! It takes time for Microsoft to propogate these changes so please wait 1-2 hours for this policy to take effect.